
Digital kitchen scales have transformed modern cooking by replacing the guesswork of volume measurements with precise weight-based accuracy. Whether you’re an experienced baker striving for consistent crumb structure, a home cook managing portion sizes, or a coffee enthusiast chasing the perfect extraction ratio, learning how to use a digital kitchen scale effectively elevates every dish you create. Unlike traditional measuring cups that yield variable results based on ingredient density and settling, digital scales deliver consistent readings that remain unaffected by humidity, compaction, or technique variations. This comprehensive guide walks you through everything from basic operation and essential functions to advanced techniques that professional chefs use daily in their kitchens.
Power On and Initialize Your Scale Correctly
Before weighing anything, proper initialization ensures your digital kitchen scale delivers accurate readings from the first use. Most models operate on AA or AAA batteries, though some include rechargeable lithium-ion batteries or AC adapters. To install batteries, locate the compartment typically beneath or on the back of the unit. Insert batteries according to the polarity indicators inside the compartment, matching positive and negative terminals correctly to prevent electronic damage.
Place your scale on a firm, level surface away from air currents, heat sources, and vibrating appliances that could interfere with readings. Press the power button to activate the internal self-test sequence—during initialization, the display typically shows all segments momentarily before settling to a zero reading. Wait for the reading to stabilize completely before placing any items on the platform. Most scales indicate stability through a stable indicator symbol or when the numerical reading stops fluctuating.
Establishing an accurate zero baseline is crucial. With the scale powered on and stable, verify that the display reads exactly zero with nothing on the platform. If a slight reading appears (such as 1-2 grams), use the tare function to reset to zero. Perform this zero setting before each new weighing session and periodically during extended use, particularly if the scale has been moved or exposed to temperature changes.
Master the Tare Function for Multi-Ingredient Recipes
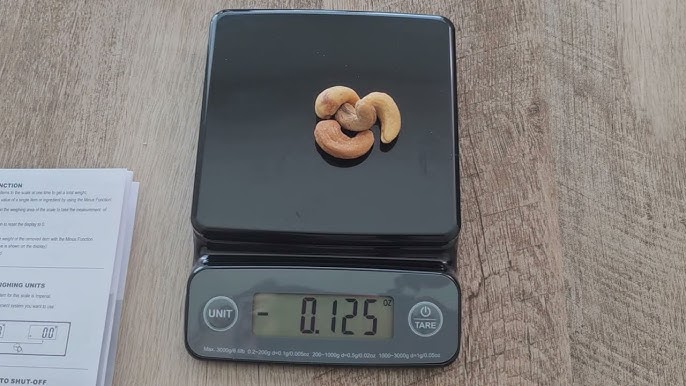
The tare function stands as one of the most valuable features on any digital kitchen scale, enabling you to zero out container weight and isolate only the contents being measured. When you place a bowl or container on the scale and press the tare button, the display resets to zero despite the container’s weight remaining on the platform. This allows direct measurement of ingredients within their intended vessels, eliminating the need for separate container weighing and subtraction calculations.
Apply Tare for Efficient Recipe Assembly
In practical cooking scenarios, the tare function enables efficient multi-ingredient measurement directly into mixing bowls. Rather than measuring each ingredient into separate containers and transferring them, follow this process:
- Place your mixing bowl on the scale
- Press tare to reset to zero
- Add your first ingredient until the desired weight is reached
- Press tare again to reset to zero
- Proceed with the next ingredient
This method, sometimes called “backwards baking” when used for cakes and breads, significantly reduces cleanup while ensuring accurate cumulative measurements. Pro Tip: For complex recipes, create a “tare log” by noting the scale reading after each taring operation, providing reference points if the process is interrupted.
Switch Between Measurement Units Seamlessly
Digital kitchen scales offer multiple measurement units to accommodate different recipes and personal preferences. Understanding these units and how to switch between them ensures you can follow any recipe regardless of its measurement system.
Grams vs. Ounces: When to Use Each
The gram represents the most precise and commonly used unit for culinary applications, particularly in baking and scientific cooking. Most digital kitchen scales display grams as the default or primary unit, with precision ranging from 1-gram increments on basic models to 0.1-gram increments on precision models. For quantities exceeding 1000 grams, the display may automatically switch to kilograms with decimal display (1.5kg rather than 1500g).
The ounce and pound units cater to users familiar with imperial measurements. Most scales offer ounce display as an alternative to grams, typically showing measurements in 0.1-ounce increments for precision work. Note that fluid ounces differ from weight ounces—ensure you understand whether recipes specify weight or volume ounces. Critical Warning: Using volume ounces instead of weight ounces can throw off your entire recipe by as much as 25%.
Weigh Different Ingredients with Proper Technique
Different ingredient types require specific techniques to ensure accurate measurements on your digital kitchen scale. Understanding these nuances prevents common errors that compromise recipe outcomes.
Dry Ingredients: Avoid the Scoop-and-Level Trap
When weighing flour, spoon it into your container rather than scooping directly from the bag, as scooping compacts the flour and results in significantly more weight than intended—a difference of 20-30% between lightly spooned and densely packed flour is common. Brown sugar should be pressed into the measuring container before weighing, while granulated sugar can be measured directly. For sticky ingredients like honey or peanut butter, lightly greasing the container or using a silicone spatula ensures complete transfer without residue.
Liquids: Account for Settling Time
Water, milk, and other thin liquids flow easily and settle quickly, providing stable readings within seconds. Thicker liquids such as oils, syrups, and molten butter require additional settling time as they may continue flowing or retain air bubbles. Allow hot liquids to cool slightly before weighing, as heat creates air currents that affect sensor accuracy and potentially damage electronic components.
Proteins: Raw vs. Cooked Weight Matters
Meat, poultry, and seafood require attention to raw versus cooked weights, as significant moisture loss occurs during cooking. A raw chicken breast weighing 200 grams may reduce to 150 grams after cooking, affecting portion calculations and nutritional tracking. When recipes specify protein weights, determine whether they refer to raw or cooked weight—professional recipes typically specify raw weight while diet programs may specify cooked weight.
Achieve Consistent Measurement Accuracy
Multiple environmental factors influence digital scale accuracy, and understanding these variables helps you compensate for potential variations and achieve consistently precise results.
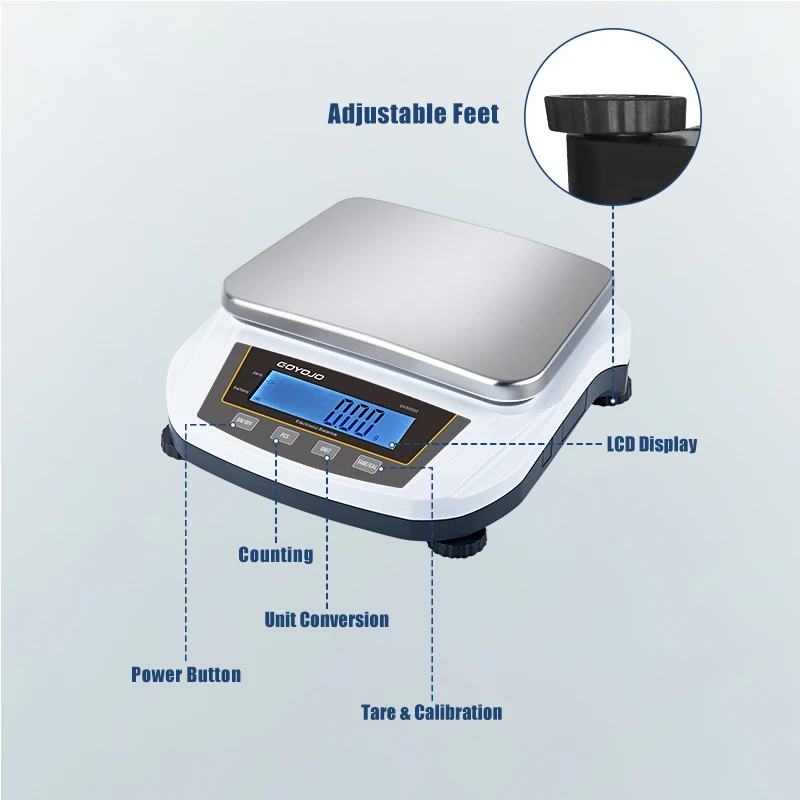
Optimize Your Scale Placement
Select a firm, level surface that doesn’t flex under weight—solid countertops, cutting boards placed on countertops, or dedicated scale mats work well. Ensure the scale sits flat with all feet making contact with the surface; many scales include adjustable feet or leveling bubbles for this purpose. Avoid placing scales near counter edges where accidental contact can occur. Pro Tip: For best results, operate your scale in stable, room-temperature conditions away from air movement and vibration sources.
Calibrate Regularly for Long-Term Accuracy
Periodic calibration maintains scale accuracy over time, particularly for frequently used or transported scales. Most digital kitchen scales include calibration mode accessed through specific button sequences documented in the user manual. The calibration process typically involves placing a known reference weight on the platform and allowing the scale to adjust its internal calculations accordingly. Calibrate monthly for daily users or quarterly for occasional use.
Maintain Your Kitchen Scale for Longevity
Regular maintenance preserves both the hygiene and accuracy of your digital kitchen scale for years of reliable service. Simple cleaning routines prevent residue buildup that affects performance while ensuring food safety.
Cleaning Best Practices
For routine cleaning, wipe the platform with a damp cloth or paper towel, avoiding excessive moisture that could penetrate electronic components. For sticky residue, mild dish soap diluted in water works effectively—ensure the platform is completely dry before use. Critical Warning: Avoid abrasive cleaners, steel wool, or harsh chemicals that could damage the platform surface or protective coatings.
Battery Care Essentials
Replace batteries when the display dims, readings become erratic, or the low battery indicator appears. Remove batteries if the scale will be stored for extended periods to prevent leakage damage. For rechargeable scales, avoid deep discharge cycles that reduce battery lifespan—recharge before complete depletion.
Apply Scale to Common Cooking Methods
Weight-based cooking provides consistent, reproducible results that volume measurements cannot match across numerous culinary applications.
Baking: Unlock Professional Results at Home

Baking and pastry benefit tremendously from weight-based methodology. Professional bakers use baker’s percentages—formulas expressed as ingredient weights relative to flour weight—to scale recipes and maintain consistency across batches. A typical bread formula might specify flour at 100%, water at 65-75%, salt at 2%, and yeast at 1%, with these ratios remaining constant regardless of total batch size. Digital scales enable precise hydration control essential for crumb structure, gluten development, and fermentation timing.
Coffee Brewing: Perfect Your Extraction Ratio
Coffee brewing has embraced weight-based methodology as both a quality standard and reproducible practice. The coffee-to-water ratio, typically expressed as 1:15 to 1:17 (1 gram coffee to 15-17 grams water), provides a starting point for dialing in extraction. Scales with 0.1-gram precision and fast response times track pour rate during brewing, allowing brewers to replicate successful pours and adjust technique.
Dietary Management: Eliminate Portion Guesswork
Dietary management and portion control represent another essential application area. Research consistently demonstrates that people underestimate portion sizes, often significantly—studies show errors of 25-50% for common servings. Weighing food eliminates this guesswork, providing precise caloric and macronutrient intake data when combined with nutritional databases or food labels.
Troubleshoot Common Scale Problems Quickly
When your digital kitchen scale isn’t performing as expected, knowing how to diagnose and resolve issues saves time and frustration. Fluctuating readings often indicate low batteries or an unstable surface—replace batteries or move to a firmer surface. Inaccurate measurements typically result from improper zero setting—reinitialize the scale and verify the zero baseline. Error messages like “Err” or “O-Ld” usually indicate overloaded conditions—remove items and restart. Pro Tip: If your scale consistently reads high or low, calibration may be needed using a known reference weight.
Develop Scale-Based Cooking Habits That Stick
Incorporating scale usage into your cooking routine requires deliberate habit formation that pays dividends in consistency and efficiency over time. Place your scale in an accessible location rather than storing it in a cabinet—scales used daily should remain on the counter. Develop a consistent workflow: power on, tare, add ingredient, tare, add next ingredient. Keep a small notebook nearby for recording weights if your scale lacks memory functions.
When transitioning from volume to weight measurements, start by converting your most-used recipes, creating a reference notebook of common ingredient weights. Understand that weight-to-volume conversions vary significantly between ingredients—a cup of flour weighs approximately 120 grams while a cup of sugar weighs approximately 200 grams. Use online conversion calculators or weight-based recipe databases as resources.
Mastering how to use a digital kitchen scale opens doors to consistent cooking results, efficient workflows, and precise control over your culinary creations. By understanding your scale’s components, mastering essential functions like taring and unit conversion, and applying best practices for different ingredient types, you join countless professional and home cooks who have abandoned volume measuring in favor of weight-based precision. Start incorporating these techniques into your daily cooking, and you’ll quickly wonder how you ever managed without one.


