
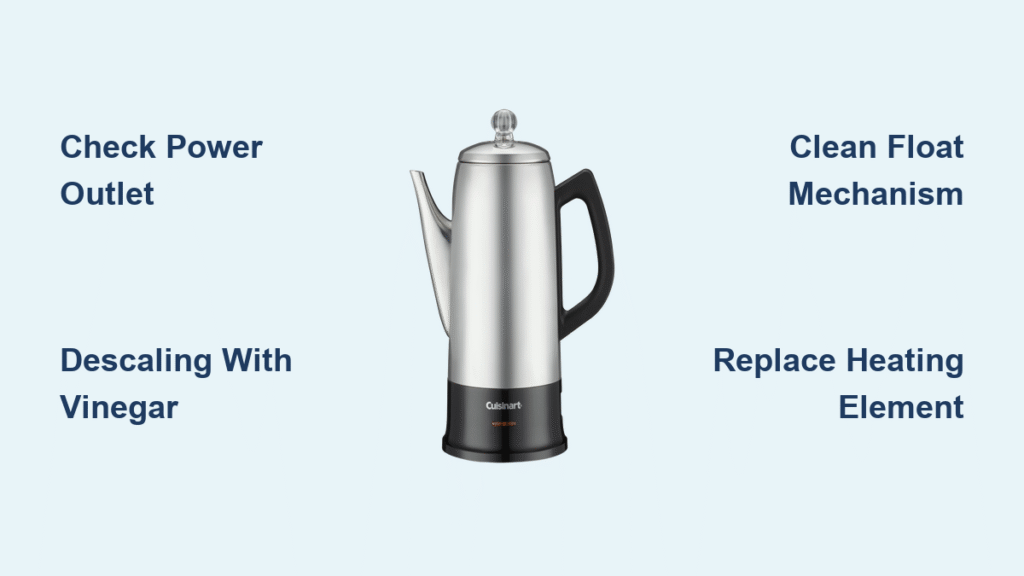
Your morning coffee ritual shouldn’t end with a silent machine and cold disappointment. When your Cuisinart percolator refuses to cooperate, the frustration is real—but so are the solutions. Whether you’re staring at a completely dead unit or dealing with mysterious blinking lights, this guide walks you through every possible fix. Most Cuisinart percolator not working issues stem from simple causes you can resolve in under 30 minutes, saving you unnecessary repair costs or premature replacement.
Power Cord and Outlet Failures: Fixing a Dead Percolator

Check Your Electrical Source Before Assuming Machine Failure
When your Cuisinart percolator shows zero signs of life, don’t jump to conclusions about internal damage. First, test your outlet by plugging in a phone charger or lamp—this simple test prevents countless unnecessary repairs. Many users waste hours troubleshooting their coffee maker only to discover a tripped GFCI outlet or blown circuit breaker.
Next, inspect the entire power cord for damage, including areas where it connects to the machine. Look for cuts, kinks, or exposed colored wires (red, blue, copper). Even internal breaks can interrupt power flow without visible damage. Test the cord on another appliance with the same plug type. If the second device works, your percolator’s cord is fine, and the problem lies inside.
If your cord needs replacement, match part numbers exactly—Cuisinart cords aren’t universal. Find your model’s specific cord on Cuisinart.com or Amazon. For internal electrical failures like circuit board issues or blown fuses, locate an authorized Cuisinart repair center. Most electrical problems within three years fall under warranty coverage, making professional service cost-effective.
Brewing Cycle Failures: When Coffee Won’t Flow Properly
Clear Mineral Buildup Blocking Your Brew Cycle
Mineral scale and coffee oil buildup cause 90% of Cuisinart percolator not working brewing issues. The vinegar descaling procedure works for all models:
- Empty the carafe and remove all grounds
- Mix 1 part white vinegar to 2 parts water (4 cups vinegar + 8 cups water for 12-cup models)
- Press the “Clean” button if available, or run a normal brew cycle
- The cleaning cycle takes 50-75% longer than normal brewing
- Discard the vinegar solution completely
- Rinse the reservoir thoroughly
- Run 2-3 full reservoirs of plain water to eliminate any vinegar taste
Prevention is key: Run this cleaning cycle every 14-21 days, even when no issues are apparent. Regular descaling prevents most brewing problems before they start. For stubborn buildup, repeat the vinegar cycle twice in succession.
Stop Water from Pooling Inside Your Percolator
When your Cuisinart stops mid-brew with water remaining, severe scale buildup is blocking the outlet tube. After running the vinegar cycle twice, if water still remains, you’ll need to access internal components.
Remove the bottom cover and inspect the outlet tube for white scale deposits. Use a pipe cleaner to manually clear stubborn buildup. Test the heating element with a multimeter—resistance should read 15-50 ohms depending on your model’s wattage. Replace the heating element if readings show open or shorted circuits, as this prevents proper water heating and circulation.
Leakage Solutions: Stop Water from Pooling Under Your Percolator
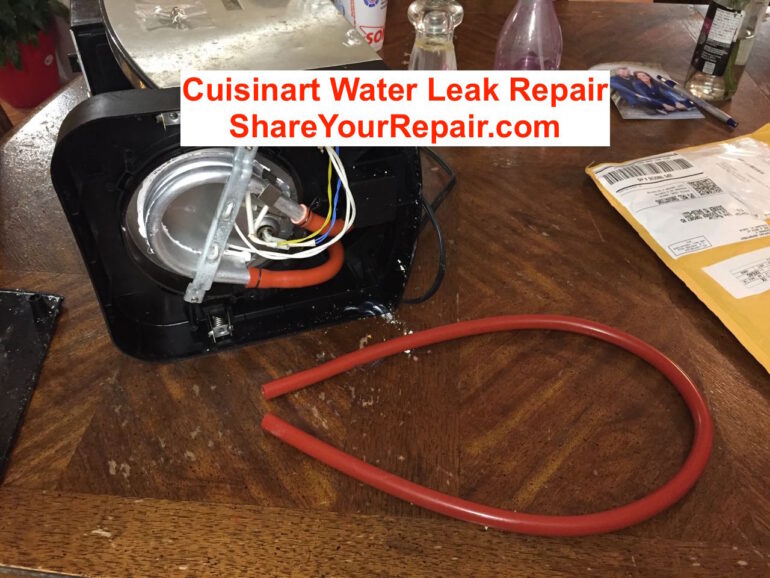
Fix Bottom Leaks After Filling
Water pooling under your percolator immediately after filling indicates internal tubing issues. Common failure points include cracked internal water tubing (silicone or vinyl) and failed rubber grommets where tubes enter the heating block.
User-level repair involves:
1. Unplugging and inverting the machine
2. Removing base screws to access internals
3. Inspecting all tubing for cracks or loose connections
4. Replacing split tubes with food-grade ¼-inch ID silicone tubing
5. Re-seating grommets and applying food-safe silicone sealant if needed
This repair typically takes 20-30 minutes and costs under $5 for replacement tubing. Many users report this fix resolving persistent leakage that previously required professional service.
Eliminate Lid Leaks During Brewing
Coffee seeping from the lid seam creates messy countertops. Root causes include warped or cracked lids and clogged vent holes from coffee oil buildup.
Quick fixes:
– Soak the lid in boiling water for 10 minutes to loosen oils
– Scrub vent holes with a pipe cleaner
– Order exact replacement lids using your model number—Cuisinart lids aren’t universal
If your lid is warped from repeated heating and cooling cycles, replacement is the only permanent solution. Most Cuisinart lids cost $15-25 and install in seconds.
Water Level Sensor Problems: Fixing the “Add Water” Light
Clear Stuck Float Mechanism Causing False Warnings
The float magnet inside your reservoir can stick due to scale or coffee residue, triggering persistent “Add Water” lights. Quick diagnosis:
- Empty the reservoir completely
- Remove and shake the float mechanism
- Clean the magnet and shaft with a vinegar-soaked cotton swab
- Test if the magnet still floats properly
If the magnet sinks or shows cracks, order a new float assembly. When the float moves freely but the light persists, the reed switch on the main board needs replacement—this requires professional service. Many users report success with the vinegar cleaning method, eliminating false warnings within minutes.
Display and Control Problems: Fixing Screen Errors

Repair Partial Character Display on Cuisinart Models
When your display only shows the top third of characters, the LCD driver or ribbon cable has failed. For DCC-1200 models, replace the display module (part #DCC-1200-01LCD). This repair requires moderate soldering skills—consider professional service if you’re not comfortable with electronics.
Before attempting replacement, check if the ribbon cable connecting the display has become loose. Sometimes simply reseating this connection resolves partial character display issues without component replacement.
Resolve the Mysterious “X” on Your Display
An “X” mark appearing on your screen indicates an EEPROM fault. First step: Unplug the unit for 60 seconds and plug it back in. This power cycle resets temporary memory issues in 30% of cases.
If the “X” remains, the control board needs replacement under warranty or by an authorized service center. Many users report this issue occurs after power surges, so consider using a surge protector with your Cuisinart percolator.
Prevent Common Brewing Disasters
Stop Basket Overflow Before It Happens
Coffee erupting over the basket sides creates kitchen chaos. Prevention rules:
- Use one standard scoop (2 tablespoons) per 6 ounces of water
- Never exceed 15 tablespoons in a 12-cup basket
- Ensure the basket is fully inserted and properly seated
- Rinse the basket after each use—coffee oils reduce effective volume over time
Know your capacity: Basket sizes vary by model (10-cup, 12-cup, 14-cup). Check your specific model’s markings. Overfilling is the #1 cause of overflow disasters—most users unknowingly exceed their machine’s capacity by 20-30%.
Flavor and Performance Fixes: Improve Coffee Taste
Eliminate Metallic or Bitter Coffee Taste
Bad-tasting coffee stems from multiple sources:
Bean quality: Switch to freshly roasted Arabica beans stored in an airtight container in a cool place. Avoid oily dark roasts that clog internal mechanisms.
Water quality: Use filtered water with 50-100 ppm hardness. Chlorinated tap water ruins coffee flavor and accelerates mineral buildup.
Staleness: Brew smaller, fresher batches. Turn off the warming plate after 20 minutes to prevent burning.
Internal residue: Deep-clean all removable parts weekly, and run vinegar cycles bi-weekly. Many users report dramatic flavor improvements after proper cleaning.
Maintenance Schedule That Prevents 90% of Problems
| Task | Frequency | Materials Needed |
|---|---|---|
| Rinse basket & carafe | After every use | Warm soapy water |
| Wipe warming plate & exterior | Daily | Soft damp cloth |
| Clean reservoir & lid | Weekly | Warm soapy water, bottle brush |
| Vinegar descale cycle | Every 14–21 days | White vinegar + water (1:2) |
| Deep-clean grinder burrs | Monthly | Dry brush, grinder cleaning tablets |
| Replace charcoal filter | Every 60 brew cycles or 2 months | Cuisinart DCC-RWF |
Following this simple maintenance schedule prevents most Cuisinart percolator not working issues before they start. Users who maintain their machines report 2-3 times longer lifespan compared to neglected units.
Quick Model Reference for Common Problems
| Model | Common Faults | Unique Notes |
|---|---|---|
| CHW-12 | Add-water light stuck, hot-water cycling, leaks, no power | Dual water system |
| DCC-1200 | On/Off switch failure, partial brew, display issues | Classic 12-cup stainless |
| DCC-3200 | Bottom leaks, won’t grind, clock reset | Programmable 14-cup |
Your percolator problems aren’t permanent. Most issues resolve with proper cleaning, while others need simple part replacements. Start with the vinegar cleaning cycle—it’s the miracle cure for 90% of Cuisinart brewing issues. Keep this guide handy for future reference, and your morning coffee will always be ready when you are.


