
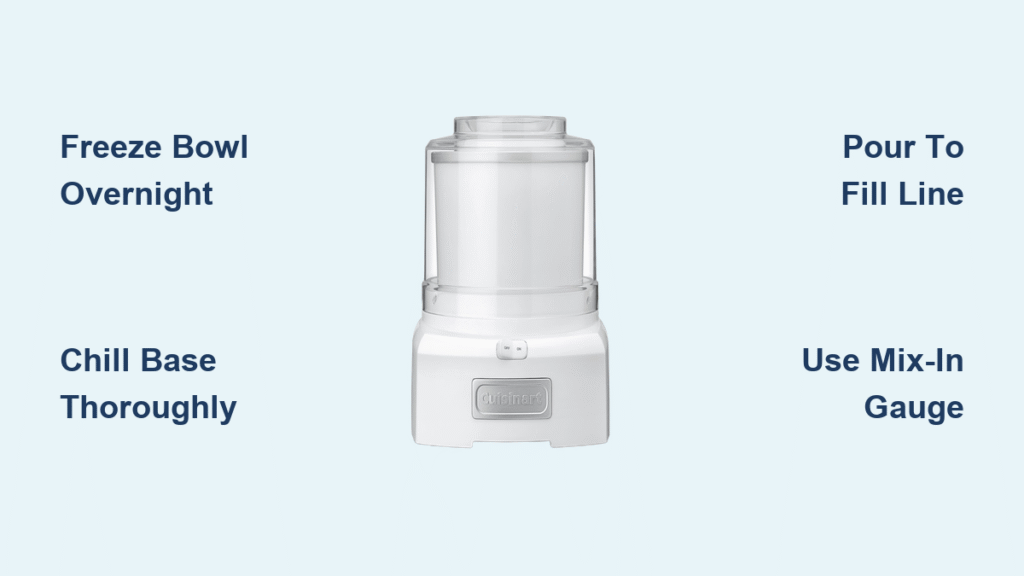
That half-frozen Cuisinart ice cream maker gathering dust in your cabinet? You’re not alone—many home chefs abandon their machines after one confusing setup attempt. But here’s the reality: mastering your Cuisinart ice cream maker setup takes just 90 seconds of active time before you start churning. This countertop marvel transforms simple ingredients into 1.5 quarts of creamy delight without salt, chemicals, or ice baths. Forget complicated science experiments; this guide reveals exactly how to configure your machine for foolproof soft-serve success every time you press start.
The magic happens through direct contact freezing—your pre-chilled base meets the double-insulated bowl’s frozen walls while the automatic mixer spins. Verified user VKD confirms: “I thought it would be a pain to set up, use, and clean… I was so wrong! It was incredibly easy.” In this guide, you’ll discover the precise freezer bowl timing, mix-in configuration tricks, and troubleshooting hacks that turn hesitant beginners into ice cream artisans. Let’s transform your appliance from neglected gadget to your kitchen’s most-requested feature.
How to Freeze Your Cuisinart Ice Cream Maker Bowl Properly
Critical Freezer Timing for Optimal Results
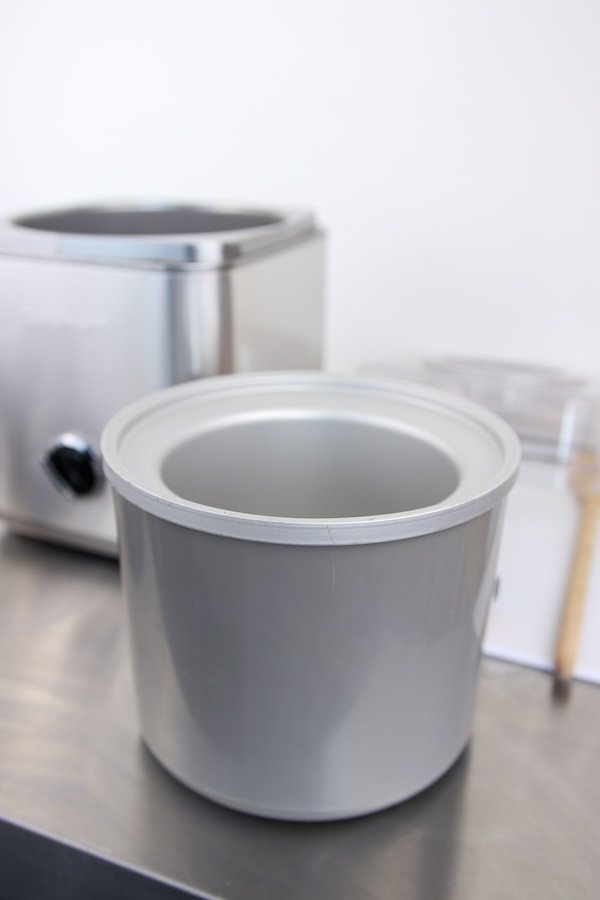
Your machine’s double-insulated freezer bowl requires several hours to overnight in the coldest section of your freezer—never skip this step. A partially frozen bowl causes liquid overflow and uneven churning. Store the bowl flat to ensure uniform freezing, and never place it near the freezer door where temperatures fluctuate. When properly frozen, the bowl’s exterior will feel solid and icy to the touch with no soft spots. Rushing this phase guarantees failure, so set phone reminders if you’re new to the process.
Smart Storage for Instant Ice Cream Cravings
Keep the bowl permanently stored in your freezer between uses. This strategic placement means spontaneous dessert requests don’t require advance planning—you’re always 20 minutes from fresh ice cream. The compact design won’t absorb odors or take excessive space, and the stainless steel housing protects against freezer burn. For households making ice cream weekly, this “always-ready” approach transforms the appliance from special-occasion gadget to everyday essential.
Pre-Chill Your Ice Cream Base Like a Pro
Why Skipping Chilling Ruins Texture
Pouring room-temperature mix into the machine overwhelms the frozen bowl, causing separation and grainy texture. Your base must be thoroughly chilled—ideally refrigerated for 2+ hours or overnight—to maintain the critical temperature differential needed for rapid freezing. Warm bases force the machine to work harder, potentially damaging the motor while yielding icy, inconsistent results. Always test by touching the mixture; it should feel cold, not cool.
Emergency Chill Technique for Last-Minute Cravings
When time’s short, use an ice bath: Fill a larger bowl with ice and salt, then nest your ice cream base container inside. Stir every 5 minutes for 20-30 minutes until the mixture reaches refrigerator-cold temperature. This method cuts chilling time by 75% while preserving emulsion integrity. Never add ice directly to your base—that dilutes flavor and alters fat content critical for creamy texture.
Machine Assembly in 90 Seconds Flat
Secure Placement of the Frozen Bowl
Remove your fully frozen bowl from the freezer and immediately place it into the Cuisinart housing unit. The bowl should click securely into position with no gaps or wobbling—if you hear rattling, reseat it firmly. This snug fit ensures maximum thermal transfer between the bowl and machine’s chilling mechanism. Work quickly during this step to minimize frost buildup from ambient humidity.
Precision Base Pouring to Prevent Mess
Pour your pre-chilled base directly into the frozen bowl, stopping at the 1.5-quart fill line etched inside the bowl. Overfilling by even ¼ cup triggers overflow during the vigorous 20-minute churn cycle. Use a liquid measuring cup for accuracy—eyeballing invites sticky countertops and wasted ingredients. For thicker mixtures like cookie dough base, tilt the bowl slightly while pouring to avoid air pockets.
One-Button Operation for Foolproof Churning
Press the single power button to activate the automatic mixer. The paddle immediately begins spinning, scraping the base against the frozen walls 60 times per minute. Never add ingredients after starting—this disrupts the freezing cycle. The machine runs continuously for 20 minutes, creating that signature light, airy soft-serve texture through precise aeration. Set a timer; churning longer than 30 minutes risks motor strain.
Configure Mix-Ins Without Clogs or Clumps

Strategic Topping Loading for Perfect Distribution
Fill the three side dispensers with your chosen mix-ins:
– Left dispenser: Small candies (M&M’s, mini chocolate chips)
– Center dispenser: Sprinkles or fine cookie crumbs
– Right dispenser: Chunky items (Oreo pieces under ½ inch)
This compartmentalization prevents ingredient cross-contamination and ensures even distribution. Load dispensers only halfway—overfilling causes jams during operation.
Size Verification Using the Built-In Gauge
Always test mix-in pieces against the included sizing gauge before loading. Anything larger than the gauge’s opening (approximately ½ inch) must be broken down further. Oversized chunks like whole pretzels or large brownie bits will jam the dispensers, requiring mid-cycle cleanup. Pro tip: Freeze cookie dough pieces for 10 minutes before loading—they stay intact longer during churning.
Cone Holder Positioning for Party-Ready Service
Snap the integrated cone holder beneath the dispensers, angled toward your serving area. Load 3-4 waffle cones vertically for instant access during churning. This position keeps cones stable without touching moving parts, allowing kids to safely catch ice cream directly into cones as it dispenses.
Dispense Perfect Servings Every Time
Lever Technique for Restaurant-Quality Portions
After 20 minutes, pull the stainless steel lever downward in one smooth motion to release perfectly aerated ice cream. Hold your bowl 2 inches below the spout to catch drips—this mimics commercial soft-serve machines. For thicker servings, pull the lever slowly; for lighter swirls, use quick, short pulls. Never force the lever if resistance occurs—that indicates frozen mix-in blockage.
Texture Customization Beyond Standard Timing
Prefer scoopable-hard ice cream? Continue churning 5-10 minutes past the standard cycle. Extended churning incorporates more air for denser texture resembling premium store brands. But monitor closely after 25 minutes—over-churning creates icy granules as fat separates. For sorbet, stop at 18 minutes to maintain delicate fruit flavors.
Immediate Enjoyment vs. Long-Term Storage
Soft-Serve Serving Protocol
Scoop directly from the machine into pre-chilled bowls for optimal texture. The 20-minute cycle produces ideal soft-serve consistency—light enough for kids to eat immediately but structured enough to hold swirls. Pair with warm sauces like hot fudge that create delightful contrast with the cold base. One batch serves 6 generously at parties.
Hardening Method for Traditional Scooping
Transfer leftovers to airtight containers using a rubber spatula, smoothing the top surface. Press plastic wrap directly onto the ice cream before sealing to prevent ice crystals. Freeze 2-3 hours for scoopable hardness. This technique also works for batch-prepping multiple flavors—you can churn three different bases back-to-back with quick rinses between.
Two-Minute Cleaning Protocol
Tool-Free Disassembly Sequence
After use, unplug the machine and:
1. Lift out the freezer bowl (holds residual cold 10+ minutes)
2. Twist off the mixing paddle with one hand
3. Pop open dispenser covers by pressing side tabs
All components separate in under 120 seconds with zero tools required. Never immerse the motor base in water—this voids warranties.
Stain Prevention for Stainless Components
Rinse parts immediately with cool water to prevent dairy hardening. For stubborn residue, soak the bowl and paddle in warm soapy water for 5 minutes before gentle scrubbing with a non-abrasive sponge. Wipe the white housing and stainless steel surfaces with a vinegar-water solution (1:1) to maintain shine without streaks. Air-dry all pieces before storage.
Troubleshooting Setup Failures
Fixing Liquid Ice Cream After Churning
If your mixture remains soupy after 20 minutes, the freezer bowl wasn’t fully frozen. Return it to the freezer for 4+ additional hours—verify by checking for condensation beads that form on properly frozen bowls. Never restart the machine with a warm bowl; this damages the motor. Prevention tip: Store the bowl in the back of your freezer, not the door.
Emergency Overflow Response
If mix begins overflowing during churning:
1. Immediately press STOP
2. Remove ½ cup of base with a measuring cup
3. Wipe exterior spills with damp cloth
4. Restart cycle
Future prevention: Chill your base below 40°F and measure ingredients precisely using liquid cups—not dry measuring cups which overfill by 15%.
Clearing Mix-In Jams Mid-Process
When dispensers jam, power off the machine and use the included cleaning tool (or chopstick) to gently dislodge blockages through the access port. Never insert metal objects—that scratches components. Restart only after verifying free movement by manually turning the dispenser gears. Always size-check mix-ins using the gauge beforehand.
Proven Setup Shortcuts for Busy Families
Sunday Batch-Prep Strategy
Make three ice cream bases on Sundays: chocolate, vanilla, and fruit sorbet. Store them in labeled, airtight containers in your refrigerator. When cravings strike, simply load the frozen bowl and press start—you’re 20 minutes from dessert with zero prep time. This system works perfectly for weekly family movie nights.
Kid-Safe Operation Framework
Assign children age-appropriate tasks:
– Ages 4-6: Load pre-sized mix-ins into dispensers
– Ages 7-9: Pull the dispensing lever (with supervision)
– Ages 10+: Measure and pour pre-chilled bases
The simple one-button operation and cool-to-touch exterior make this the safest ice cream maker for young chefs.
Recipe Adaptation Formula
Convert any ice cream cookbook recipe by:
1. Reducing sugar by 10% (frozen bases taste sweeter)
2. Ensuring fat content stays between 8-12%
3. Chilling base 12+ hours before use
The included recipe guide provides foolproof ratios, but this method unlocks endless flavor experimentation.
Permanent Storage Solutions
Countertop Display Configuration
Keep your Cuisinart on the counter between uses—it occupies less space than a toaster. The white and stainless steel design complements modern kitchens, and visible placement encourages regular use. Place a matching ice cream scoop and storage containers beside it for instant dessert station vibes.
Bowl Storage Optimization
Store the freezer bowl upright in your freezer’s door bin with the lid slightly ajar. This position prevents accidental spills while allowing quick access. The bowl’s odor-resistant material won’t absorb freezer smells, so no special wrapping is needed. For households with small freezers, nest it inside a larger container to save space.
Mastering your Cuisinart ice cream maker setup transforms dessert from chore to celebration. With the bowl perpetually frozen and bases pre-chilled in your fridge, fresh ice cream becomes as effortless as brewing coffee. Remember the golden rule: fully frozen bowl + thoroughly chilled base = perfection in 20 minutes. Start with vanilla tonight, then explore sorbets and mix-in creations—all while keeping cleanup to a mere two minutes. Your machine isn’t just collecting dust anymore; it’s the key to becoming your family’s dessert hero.


