
You reach for your Cuisinart chopper to dice onions for tonight’s dinner, but instead of uniform pieces, you end up with a watery mess. This frustrating scenario happens daily in kitchens everywhere. The compact powerhouse that should simplify meal prep becomes another source of kitchen stress when you don’t know the proper Cuisinart chopper how to use techniques. Most home cooks either under-process ingredients into uneven chunks or over-process everything into an unappealing paste.
The good news? Getting consistent results from your Cuisinart chopper takes just a few simple techniques that transform this often-misunderstood appliance from frustrating to indispensable. Unlike food processors with complicated settings, your chopper’s simplicity is its strength—once you understand the pulse rhythm and loading techniques specific to this compact machine. This guide walks you through everything from initial setup to advanced processing methods, ensuring you get perfect results every time you reach for this versatile kitchen tool.
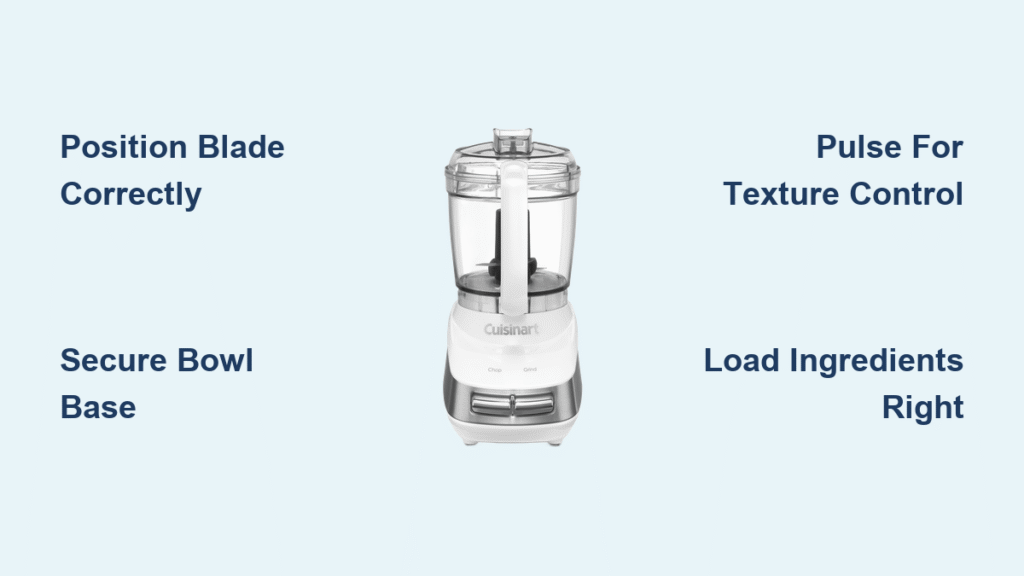
Position Blade Correctly for Optimal Performance
The dual curved stainless steel blades in your Cuisinart chopper create the vortex action that chops ingredients efficiently. Proper blade placement is non-negotiable for consistent results. Place the blade assembly over the center post with blades facing upward—never downward. You’ll hear a distinct audible click when properly seated. This click confirms the blade has locked into the drive mechanism, which is essential for the chopper to function correctly.
Never force the blade assembly if it doesn’t seat easily. Most “chopper won’t work” issues stem from food debris blocking the connection point between blade and drive post. Before each use, inspect the underside of the blade assembly and the center post for dried food particles. A quick wipe with a damp cloth solves most connection issues. Remember that improperly seated blades not only prevent operation but can also cause dangerous wobbling during use that damages your appliance.
Secure Work Bowl Base Before Processing
Your Cuisinart chopper’s safety mechanism depends entirely on proper bowl alignment. Align the bowl’s handle with the motor base’s front marking, then twist clockwise until you feel firm resistance—this usually requires about a quarter turn. The bowl should sit completely flush without any wobbling or gaps. An improperly seated bowl prevents the safety switch from engaging, which is why many users mistakenly think their chopper is broken when it simply won’t start.
Test the connection by gently trying to lift the bowl after securing it. If it lifts easily, twist it further until it locks completely. This step is crucial because the chopper’s motor only activates when the bowl is correctly positioned and locked. When you hear that satisfying click as the bowl locks into place, you’ve created the proper electrical connection that allows safe operation.
Load Ingredients Using Professional Techniques
:max_bytes(150000):strip_icc()/faw-cuisinart-core-custom-4-cup-mini-chopper-rkilgore-0130-a8b91d85408e44f3ae1b0d3af5f3b39f.jpeg)
Success with your Cuisinart chopper begins before you press any buttons. Cut larger items like onions, carrots, or celery into uniform 1-2 inch pieces for even processing. This size allows ingredients to move freely around the blades without creating pockets of unprocessed food. Overloading your chopper is the most common mistake home cooks make—it strains the motor and creates uneven results with half the ingredients pureed while others remain whole.
Follow Maximum Fill Guidelines for Different Ingredients
Different ingredients require different loading approaches to achieve perfect results. For dry ingredients like nuts or breadcrumbs, fill to just below the blade level—never above it. When processing wet ingredients like tomatoes or cooked vegetables, use only two-thirds of the bowl’s capacity maximum to prevent liquid from leaking through the base. For delicate herbs like cilantro or parsley, loosely pack them without compressing to avoid turning them into a green paste. When making nut butters or processing hard ingredients like coffee beans, work in 1-cup batches for best texture and to prevent motor strain.
Layer Ingredients Strategically for Uniform Results
Place hardy vegetables like carrots or onions at the bottom of the bowl, followed by medium-density ingredients like bell peppers, with softer items like tomatoes or herbs on top. This layering technique prevents delicate ingredients from over-processing while allowing tougher items sufficient time to reach your desired consistency. For salsa specifically, layer tomatoes last to maintain some desirable chunkiness. When making pesto, add garlic and nuts first, followed by cheese, then finally the basil on top to prevent browning and maintain vibrant color.
Master Pulse Technique for Complete Texture Control
The pulse button on your Cuisinart chopper gives you precise control that continuous operation never could. Unlike food processors with multiple speed settings, your chopper’s simplicity relies entirely on your pulse rhythm. Hold the pulse button for 1-2 seconds, release, then count to three before checking consistency. This brief pause allows ingredients to settle back toward the blades for the next cut, creating more uniform results.
Apply Basic Pulse Method for Different Recipes
For guacamole, aim for 8-10 pulses with brief pauses between each. Pesto requires more aggressive processing—15-20 pulses with shorter pauses. When making breadcrumbs from stale bread, use quick 1-second pulses until you reach the desired crumb size. Counting your pulses creates consistency across batches—you’ll know exactly how many pulses deliver your preferred texture every time. Watch through the clear lid for visual cues: stop when pieces reach your preferred size because you can always process more, but you can’t un-chop ingredients.
Adjust Technique for Specific Texture Requirements
For chunky salsas, use 3-4 quick pulses with longer pauses between each activation. Creamy hummus needs longer pulses (2-3 seconds) with brief 1-2 second pauses. When making nut butters, begin with short pulses until ingredients become crumbly, then transition to longer continuous processing as the oils release. The key is watching your ingredients rather than relying solely on pulse counts—different batches may require slight adjustments based on ingredient moisture content and temperature.
Troubleshoot Common Chopper Issues Immediately
Even experienced users encounter problems with their Cuisinart chopper. These quick fixes solve the most frequent frustrations before they ruin your meal prep. When your chopper won’t start, immediately check three things: ensure the bowl locks completely into the base, verify the lid is properly aligned with the bowl’s handle, and confirm the power cord connection is secure. Most “broken chopper” issues are actually safety mechanism failures from improper assembly.
Fix Uneven Chopping Results in Seconds
Large pieces mixed with mush indicate you’ve overloaded the bowl. Remove half the ingredients and process in smaller batches. For herbs that turn brown or become pasty, try the “pulse and scrape” method—pulse twice, stop to scrape down the sides with a rubber spatula, then continue. This technique ensures all ingredients receive equal processing time. When chopping onions, add a tablespoon of vinegar to the bowl before processing—it prevents oxidation and creates cleaner cuts without excessive tearing.
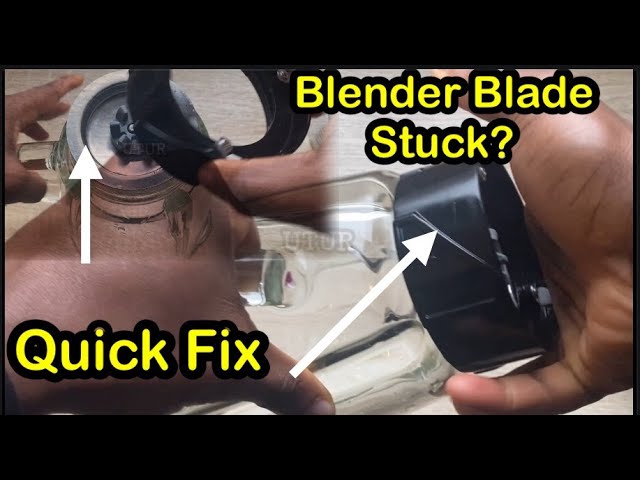
Release Stuck Blade Assembly Safely
Food debris often jams the blade post after processing sticky ingredients like dates or nut butters. Fill the bowl with warm soapy water, let it soak for 5 minutes, then try removal. For stubborn cases, use a rubber jar opener for better grip on the blade hub—never use metal utensils that could damage the blade. Always unplug the unit completely and wait for the blade to stop spinning before attempting any removal.
Prevent Overprocessing with Visual Cues
Nothing ruins fresh pico de gallo faster than turning vibrant tomatoes into soup. Watch for these visual signs to stop processing immediately: tomatoes release excessive seeds and juice, onions become translucent rather than opaque, herbs darken significantly in color, or ingredients start clumping together. These indicators mean you’ve passed the ideal texture point.
Implement Batch Processing for Large Quantities
When making large quantities of salsa or pesto, work in smaller batches rather than overfilling the bowl. Process each batch to the same consistency, then combine in a separate mixing bowl for final seasoning. This prevents bottom ingredients from over-processing while top pieces remain untouched. For nut butters, process in 2-cup batches maximum—larger quantities create inconsistent textures as the motor struggles with the workload.
Store Components to Extend Appliance Lifespan
Proper storage keeps your Cuisinart chopper ready for action and extends its service life significantly. Store blades in their original protective cover or wrap blade edges securely in a thick paper towel. Keep them in a designated drawer section away from other utensils—never store blades loose where they can get damaged or cause injury.
Maintain Work Bowl for Long-Term Performance
Avoid stacking heavy items on the work bowl, which can crack or warp the plastic over time. Store with the lid slightly ajar to prevent odor retention from strong ingredients like garlic or onions. If storing the chopper assembled, place a paper towel between the blade and bowl to prevent moisture buildup that could dull the blades. Always ensure all components are completely dry before storage to prevent mold or mildew growth.
Advanced Processing Techniques for Culinary Excellence
Once comfortable with basic chopping, these professional techniques expand your Cuisinart chopper’s capabilities beyond simple dicing. Create perfect emulsified dressings by adding oil through the feed tube while pulsing. Start with 3 pulses to combine vinegar and seasonings, then drizzle oil in a slow, steady stream through the lid opening while continuing to pulse. This technique makes restaurant-quality vinaigrettes with stable emulsions that don’t separate.
Process Frozen Ingredients Without Damage
Briefly thaw frozen fruits for 5-10 minutes before processing to prevent blade damage while maintaining frozen texture. Perfect for quick sorbet bases—add slightly thawed berries with a tablespoon of sugar and pulse until smooth but still icy. When making smoothie bases, process frozen fruit in short bursts with 30-second pauses to prevent motor strain from continuous operation with hard ingredients.
Mastering your Cuisinart chopper transforms meal prep from frustrating to effortless. Start with these fundamental techniques, then experiment with timing and ingredient combinations. Remember: sharp blades properly positioned, ingredients loaded correctly, and controlled pulsing create perfect results every time. Clean components immediately after use following safe handling procedures, and your chopper will serve you reliably for years to come. The secret to professional results isn’t expensive equipment—it’s knowing exactly how to use what you already have in your kitchen.


