
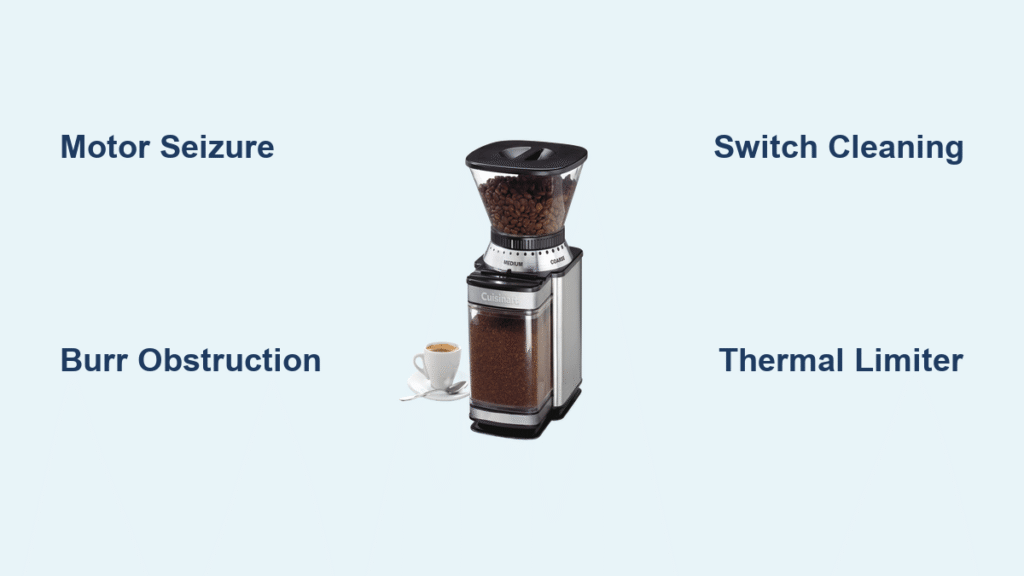
Your morning ritual hits a wall when your Cuisinart burr grinder suddenly stops grinding. The beans sit untouched, your coffee craving intensifies, and you’re staring at a machine that either hums uselessly or does nothing at all. This frustrating scenario affects countless coffee lovers, but most grinding failures stem from just a handful of fixable issues.
Whether your grinder vibrates without producing grounds, runs intermittently, or simply won’t turn on, this guide walks you through proven solutions. You’ll learn to diagnose the exact problem, implement targeted fixes, and prevent future failures—all without expensive repairs or replacements. When your Cuisinart burr grinder not grinding properly, these steps will get your coffee flowing again in minutes.
Motor Seizure Symptoms and Solutions
Recognize the Telltale Humming Sound
When your Cuisinart burr grinder produces a steady humming noise but the burrs refuse to spin, motor seizure is the likely culprit. This mechanical failure occurs when the motor shaft locks up due to dried lubrication or accumulated coffee debris. The motor tries desperately to turn, creating that distinctive humming sound without any actual grinding action.
Quick Fix Steps:
– Unplug the grinder immediately to prevent motor damage
– Access the motor shaft by removing the bottom plate (usually 4-6 screws)
– Clean the shaft thoroughly with a cotton swab and isopropyl alcohol
– Apply 1-2 drops of lightweight machine oil to each bearing point
– Manually rotate the shaft 10-15 times to distribute oil evenly
– Test the grinder empty before adding beans
Prevent Future Seizures
Motor seizure often results from skipped maintenance. Coffee dust works its way into motor bearings over months of use, gradually creating friction. Schedule monthly shaft cleaning if you grind daily, or every 6-8 weeks for occasional use. This simple 5-minute task prevents the most common cause of grinding failure. If you notice your Cuisinart burr grinder not grinding as smoothly as before, address lubrication issues immediately before they cause complete seizure.
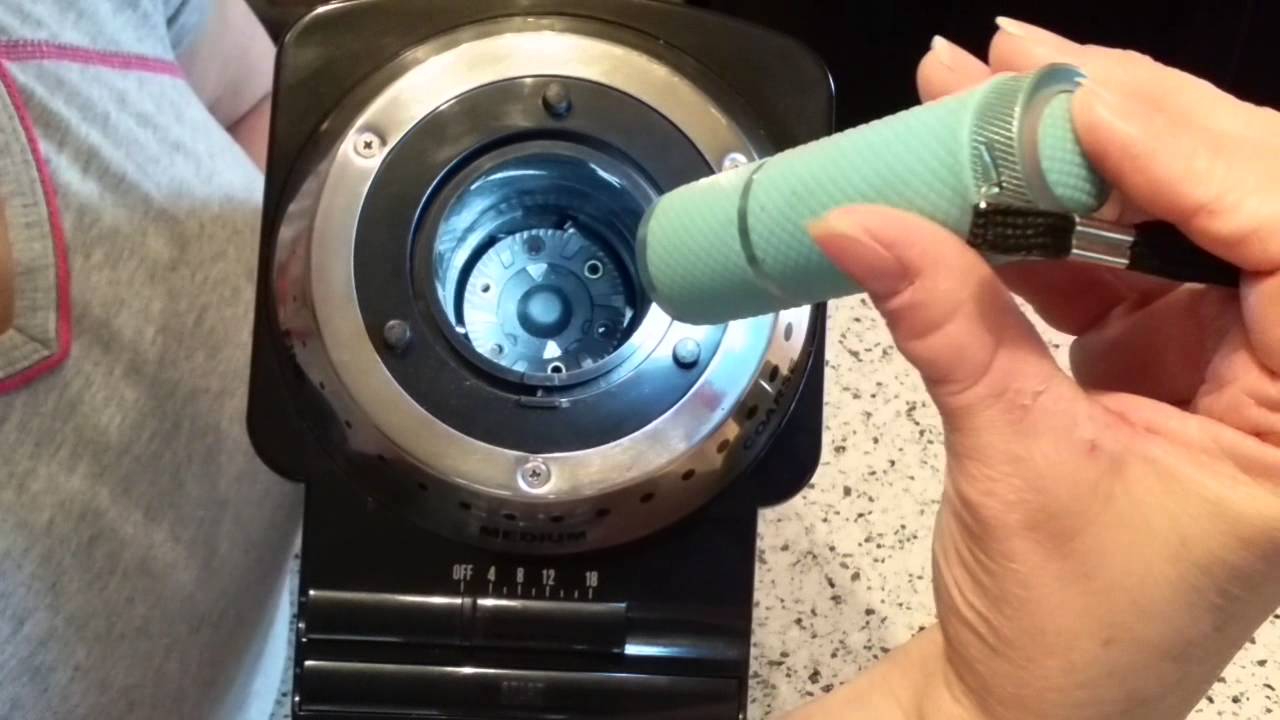
Burr Obstruction Removal Guide
Locate Hidden Coffee Blockages
When your grinder vibrates and sounds like it’s working but produces no grounds, coffee particles have likely created a physical blockage. These obstructions form gradually as grounds accumulate between the burrs or jam the exit chute. The motor strains against the blockage, creating unusual vibrations without any actual grinding.
Systematic Disassembly Process:
1. Remove the bean hopper by turning counterclockwise
2. Lift out the upper burr – most Cuisinart models use a twist-lock mechanism
3. Inspect the grinding chamber for visible clumps or packed grounds
4. Check the chute between the burrs and collection chamber
5. Use a wooden skewer (never metal) to dislodge stubborn blockages
6. Brush all surfaces with the included cleaning brush or soft toothbrush
Common Obstruction Hotspots
Focus your inspection on three critical areas. Between the burrs, look for compacted grounds that prevent rotation. The exit chute often clogs when oily beans leave residue. The collection chamber’s entrance can accumulate fine particles that eventually back up into the grinding mechanism. Never force beans through when your Cuisinart burr grinder not grinding properly—this creates more pressure on already jammed components.
Switch and Electrical Troubleshooting
Clean Sticky Coffee Switches
Intermittent operation or complete failure to activate usually indicates switch contamination. Coffee grounds work their way into switch mechanisms, preventing proper electrical contact. This problem develops gradually—you might notice the grinder works better after tapping the switch or holding it at a certain angle.
Switch Restoration Method:
– Disconnect power completely before starting
– Use a fine artist’s brush to sweep grounds away from switch housing
– Dip a toothpick in isopropyl alcohol and run it around switch edges
– Press and release the switch 20-30 times to dislodge internal debris
– Test continuity with a multimeter if available (should show connection when pressed)
– Replace the switch if cleaning fails to restore consistent operation
Safety Interlock System Checks
Cuisinart grinders include safety mechanisms that prevent operation when components aren’t properly seated. Verify the bean hopper locks completely into position—you should hear an audible click. Check the collection chamber sits flush against the base. Confirm the lid creates proper contact if your model includes one. These simple checks solve many “dead” grinder complaints when your Cuisinart burr grinder not grinding at all.
Thermal Limiter and Overload Issues

Recognize Burnout Symptoms
When your Cuisinart burr grinder shows no signs of life despite having power, the thermal limiter may have failed. This safety device cuts power when the motor overheats, protecting against permanent damage. However, repeated overheating can permanently damage the limiter itself, requiring replacement.
Warning Signs Before Complete Failure:
– Grinder runs slower than usual during operation
– Motor casing feels unusually warm after grinding
– Brief operation followed by sudden shutdown
– Burning smell during use
Prevention Over Replacement
Thermal limiter failure typically indicates misuse. Never run the grinder continuously for more than one minute—pulse grinding prevents overheating. Allow 2-3 minute cooling periods between batches, especially when grinding large amounts. Avoid forcing beans through when the grinder struggles, as this strains the motor significantly. These habits eliminate the root cause rather than repeatedly replacing limiters when your Cuisinart burr grinder not grinding properly.
Professional Repair vs DIY Decisions
Know When to Call Experts
While most grinding issues are DIY-friendly, certain scenarios justify professional service. Motor replacement requires specialized tools and electrical knowledge beyond most home users. Internal wiring problems create safety hazards if improperly repaired. Complex disassembly in newer models often includes tamper-proof screws and sealed components.
Cost-Effective Decision Matrix:
– DIY worth it: Cleaning, minor obstructions, switch cleaning, basic maintenance
– Professional recommended: Motor replacement, electrical issues, warranty work
– Replace unit: When repair costs exceed 50% of new grinder price (typically $150+ repairs on $200 units)
Warranty Claims Simplified
Cuisinart maintains a reputation for honoring their 15-month warranty without hassle. Keep your purchase receipt and take photos of the problem. Contact their customer service at 1-800-726-0190 rather than attempting complex repairs yourself. Document the issue with video if possible—warranty claims often process faster with visual proof of failure. If your Cuisinart burr grinder not grinding and is under warranty, don’t void it with unnecessary disassembly.
Preventive Maintenance Schedule
Daily Habits That Save Your Grinder
Simple daily practices prevent 90% of grinding failures. Empty the grind chamber completely after each use—leftover grounds absorb moisture and create clogs. Brush visible grounds from burr surfaces using the included tool. Wipe the hopper interior weekly to prevent oil buildup from beans. These 30-second habits eliminate the conditions that cause most malfunctions.
Monthly Deep Cleaning Protocol
Establish a regular deep cleaning schedule based on usage frequency. Heavy users (daily grinding) should perform complete disassembly monthly. Moderate users can extend to every 6-8 weeks. Light users benefit from quarterly cleaning regardless of apparent performance.
Complete Cleaning Checklist:
1. Unplug and disassemble completely
2. Wash removable parts in warm, soapy water
3. Clean burr surfaces with soft toothbrush
4. Vacuum motor area using brush attachment
5. Dry all components thoroughly before reassembly
6. Test run empty to verify proper operation
Environmental and Usage Factors
Bean Selection Impact on Reliability
Your coffee choice directly affects grinder longevity. Oily, dark roasts create significantly more buildup and require more frequent cleaning. Very light roasts may be too hard for older motors. Medium roasts offer the best balance of flavor and mechanical reliability. Store beans in airtight containers away from heat and moisture to prevent clumping issues that cause your Cuisinart burr grinder not grinding consistently.
Optimal Storage Conditions
Environmental factors play a crucial role in preventing grinding failures. Store your grinder in a dry location—moisture causes grounds to clump and motors to corrode. Keep away from heat sources like ovens or direct sunlight, which can warp plastic components. Use a surge protector to prevent electrical damage from power fluctuations that might affect your Cuisinart burr grinder not grinding properly.
Quick Diagnostic Reference
60-Second Problem Identification
Use this rapid assessment to pinpoint your issue:
– No power, no sound: Check outlet, safety switches, thermal limiter
– Humming without grinding: Motor seizure or severe obstruction
– Intermittent operation: Switch contamination or loose connections
– Irregular grinding: Burr damage or misalignment
– Excessive vibration: Worn bearings or bent components
Emergency Troubleshooting Flow
When you need coffee now, follow this priority sequence:
1. Check safety interlocks (30 seconds)
2. Clear visible obstructions (2 minutes)
3. Clean switch contacts (3 minutes)
4. Manual motor shaft rotation (2 minutes)
5. Professional assessment if above fails
Your Cuisinart burr grinder should provide years of reliable service with proper maintenance and prompt attention to developing issues. Most grinding failures result from preventable buildup or simple component contamination rather than catastrophic mechanical failure. By addressing problems early and maintaining preventive habits, you’ll enjoy consistent, fresh-ground coffee without the frustration of unexpected breakdowns.


